

File Sync Server Prerequisite
- Create an Storage Account
- Create the File Server (Creation of Azure File Server )
- On-premises Machine with 2012 R2 or 2016R2 with Latest Powershall (5.1)
- Get-Module PowerShellGet -list | Select-Object Name,Version,Path
- # Install the Azure Resource Manager modules from the PowerShell Gallery
Install-Module AzureRM -AllowClobber
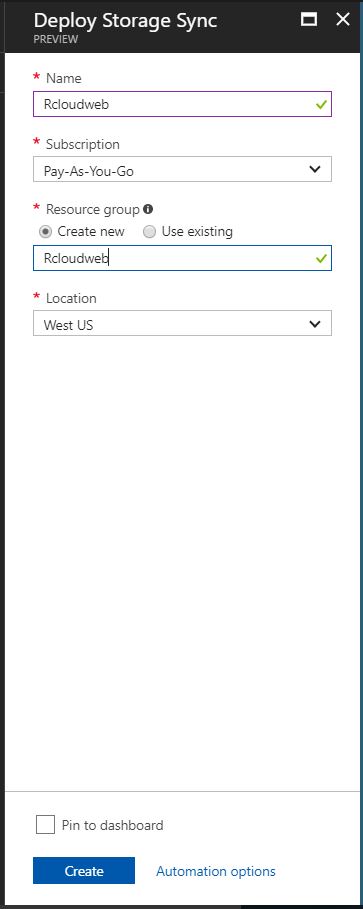
4: Name, Subscription, Resource Group and Location.
5: File Location Should be D:\FolderName
Step-1 : Login to Azure Portal and Select the File Storage Account
Please Login to Azure Subscription (Azure Portal)
- Click on Storage Account
- Select the File Sync Server
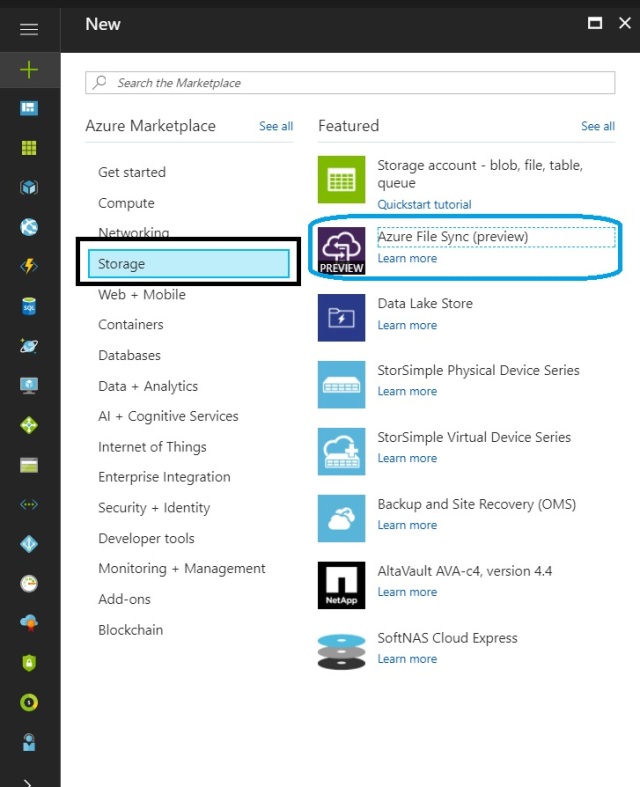
Step 2-Create the File Sync Server
- Please Provide the File Sync Server Name
- Subscription
- Resource Group Name
- Location (It is available in Few Location like West US)
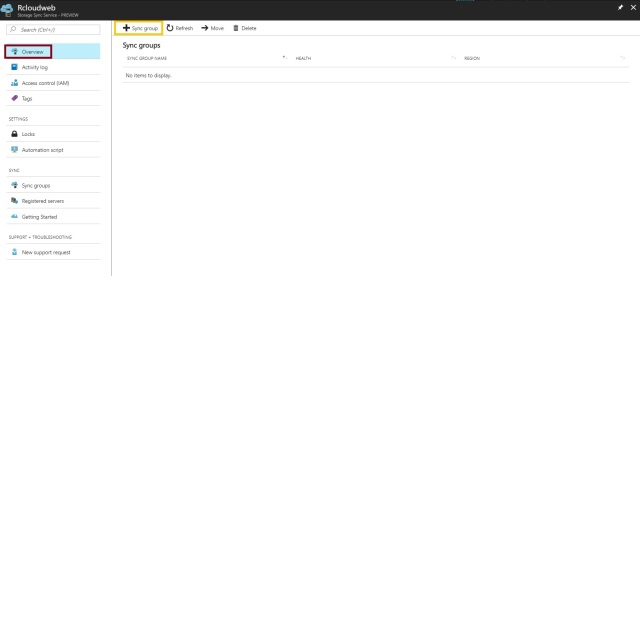
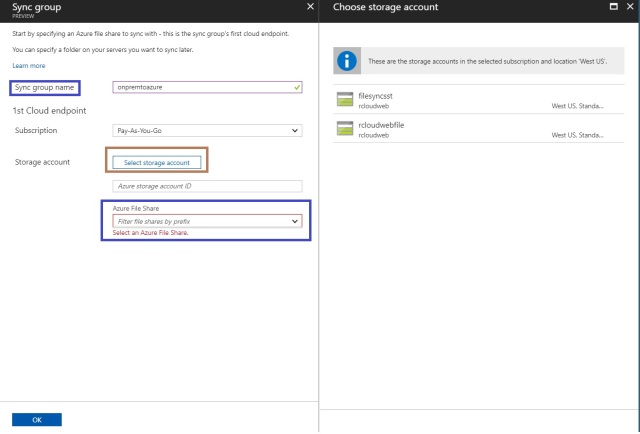
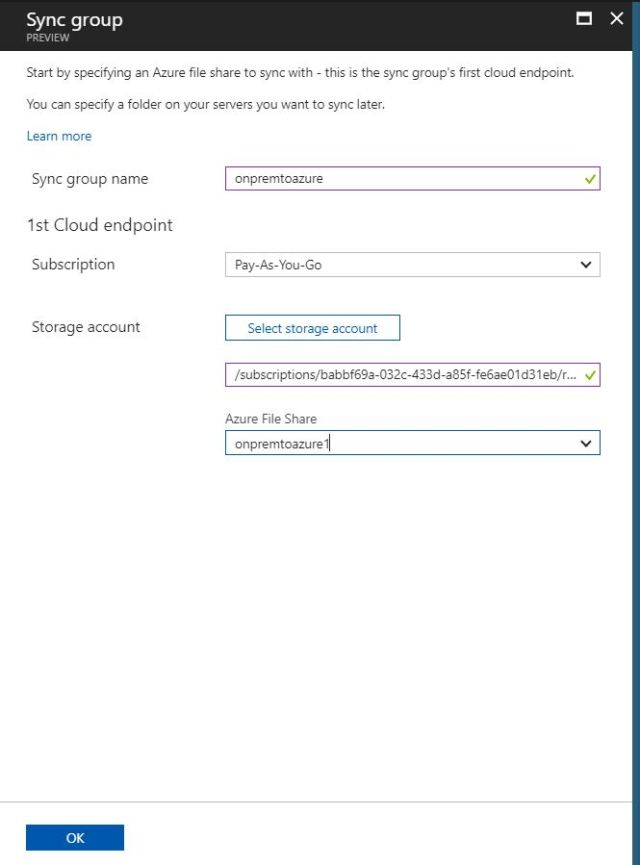
Step-3: Create the Sync Group
Click on the Sync Group
- Provide the Sync Group Name
- Select the Subscription
- Select the Storage Account
- Select the File Server
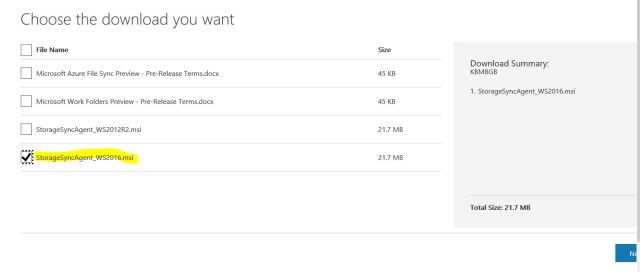
- Please Download the Azure Storage Sync Agent
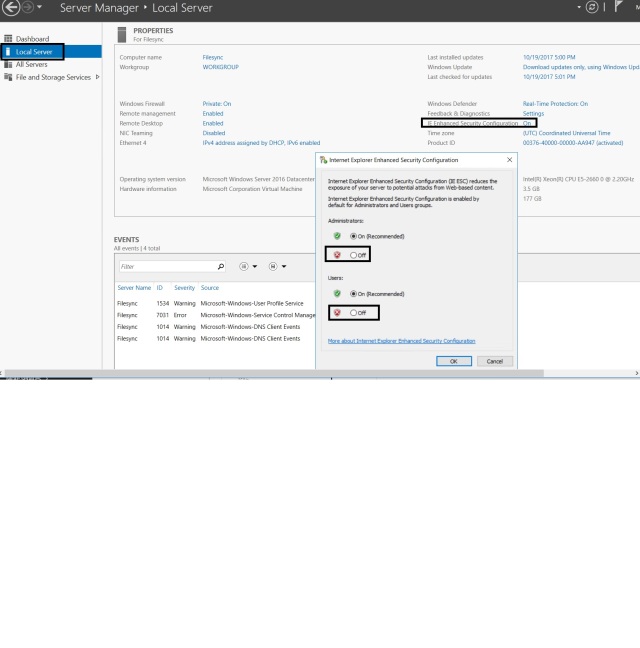
- Installed on the Server 2012 R2 or 2016 Server in You on-premises

- Login to the server and Turn of the internet security : Test Purpose not Recomanded. for Production Environment.
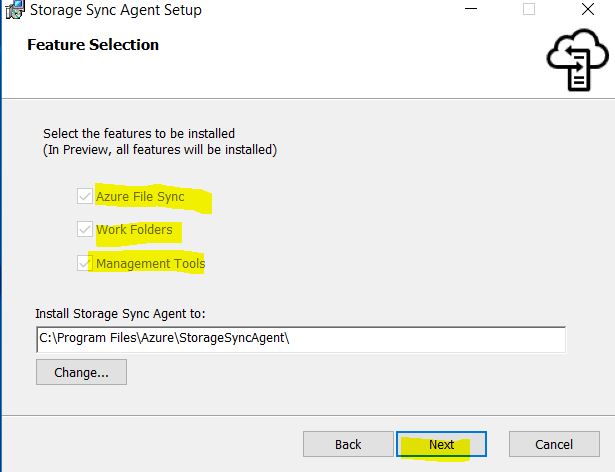
- Selected the File as per your Server Requirements.
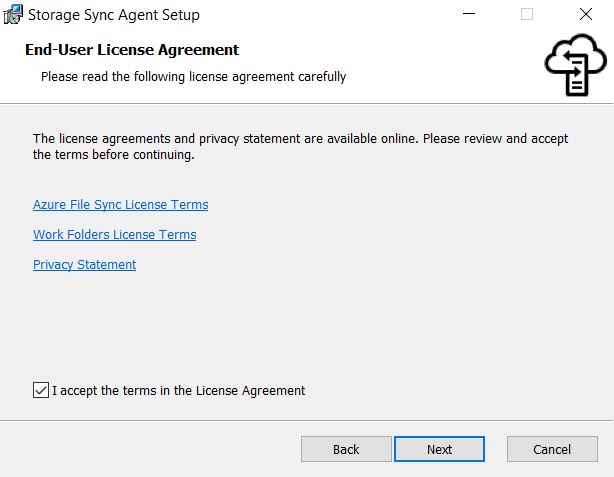
- Installed the Storage Sync Agent Setup

- Accept the Term and Condition
- Select the Folder Location for installation Files
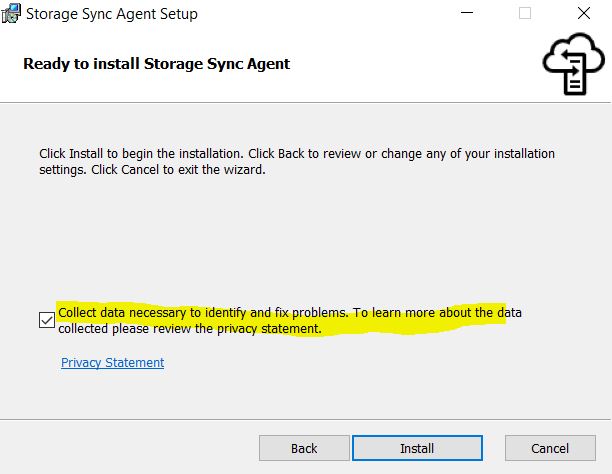
- Select Collect Data Necessary to Identify and Fix the Problem.
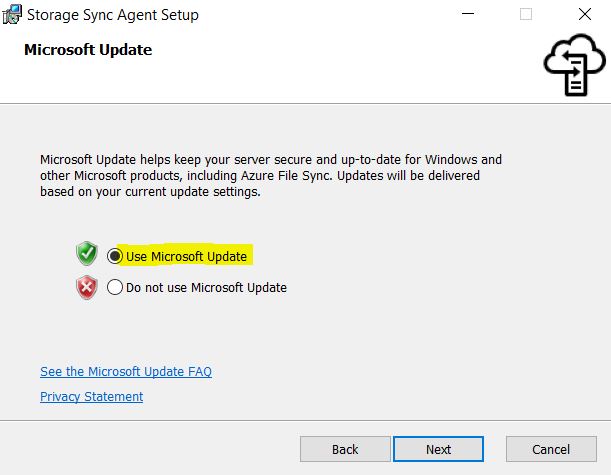
- Select the Microsoft Update .
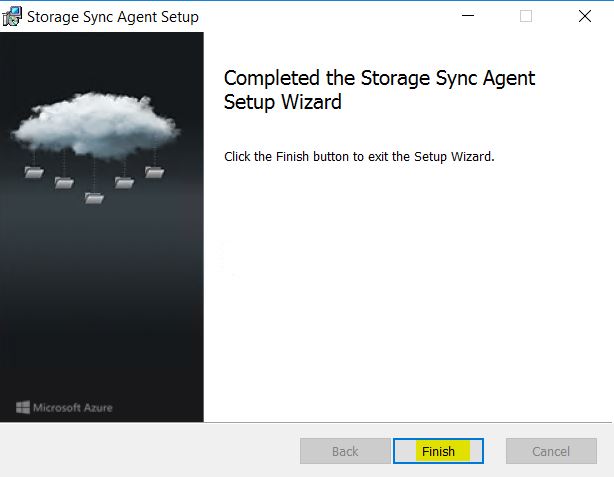
- Click on Finish
You will get an Pre-requisite error as as powershell version is old.
Please use the Pre-requisite section command line to update the power-shell.
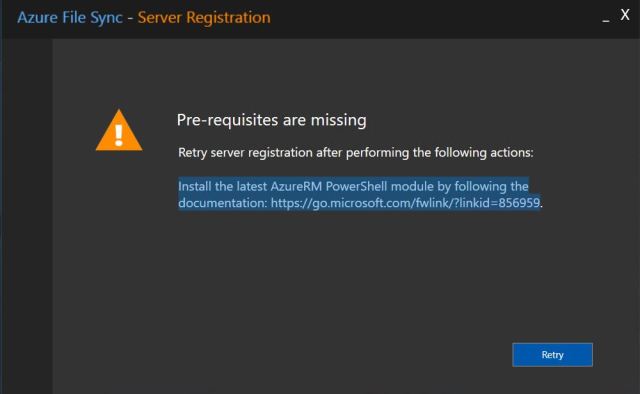
Please find the below Command.
- Get-Module PowerShellGet -list | Select-Object Name,Version,Path
- # Install the Azure Resource Manager modules from the PowerShell Gallery
Install-Module AzureRM -AllowClobber

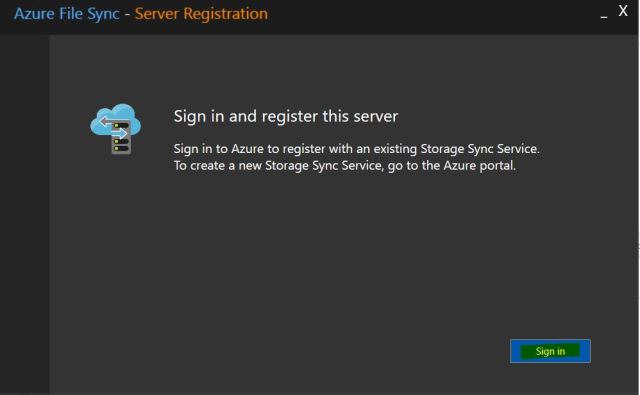
- Sign in and Register the Server
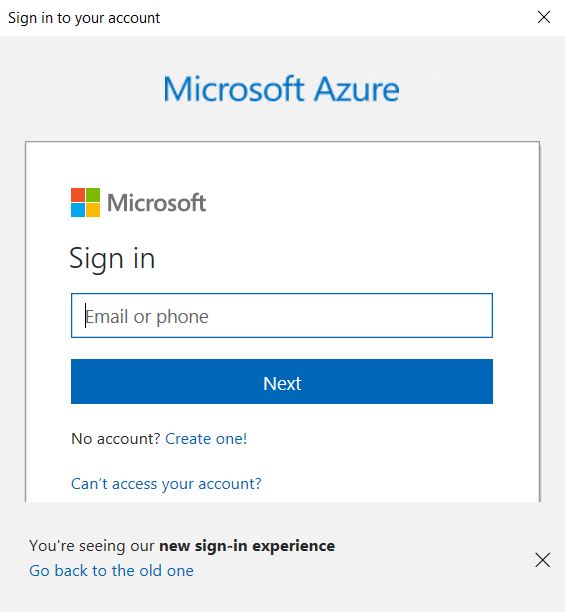
- Click on Sign and you will get Azure Portal login Windows.
- Please provide the user ID and password.
- Select the Subscription Name
- Select the Resource Group
- Select the Storage Sync Services.
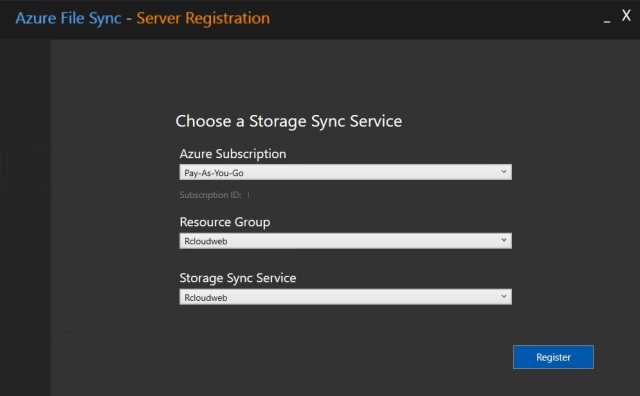
- Click on Register and Sign-in Again

- Registration Success Full
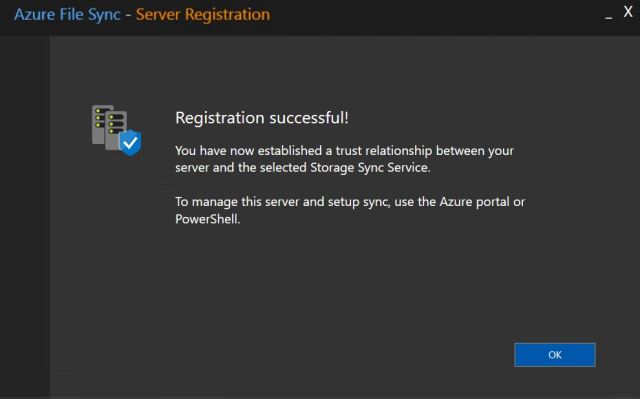
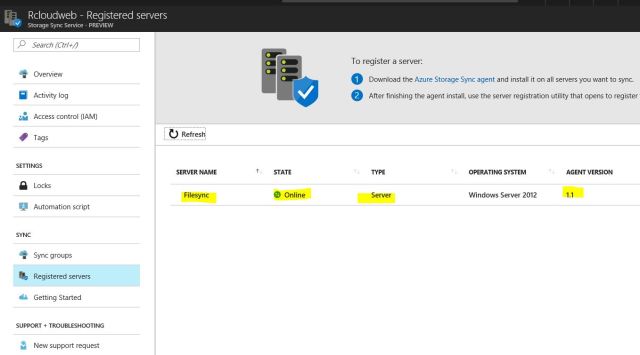
- Once you will register the server you will see in File sync Register Server list .
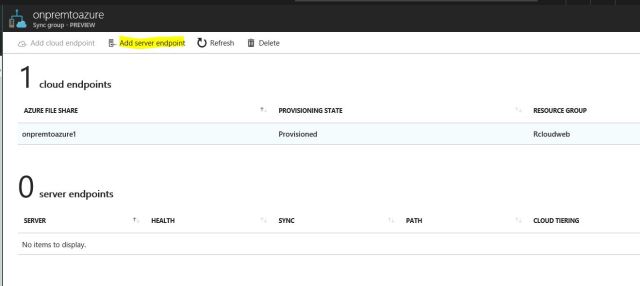
- Click on Add Server Endpoint
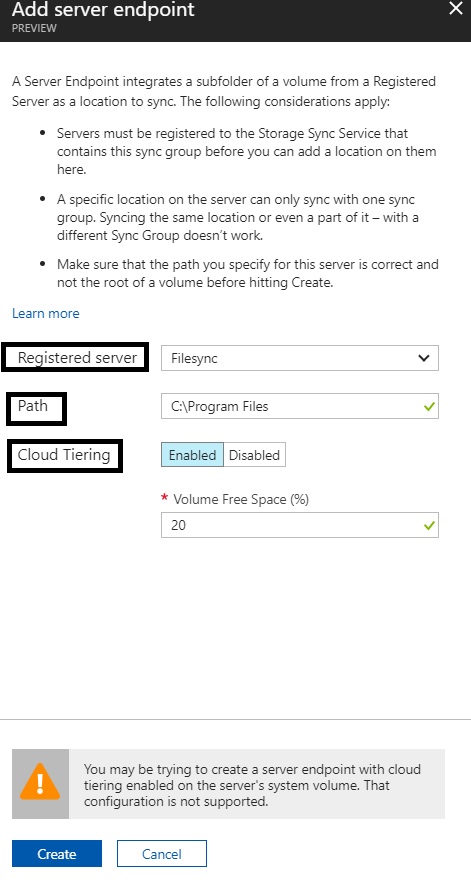
Add Server Endpoint
- Register Server
- Path
- Cloud Tearing : How much free space you want.
- Your Cloud Endpoint is created.
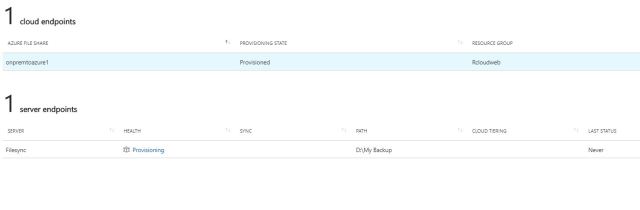
- Verify your Cloud point is Healthy

- Verify the Files in Azure File Share and you have Successfully Deploy the File sync Server.


Pingback: All in One:Azure Learning for Beginners – RCloud